
Fig 1: Logo Cards
Here I am giving an elegant way for displaying logos (images) as cards using Oracle APEX classical report. This has been inspired by apex.oracle.com.
Cards: A card is any type of custom element used for easy showing of contents that comprises various types of objects like title, image, button, etc. These cards could be anything like CSS material based cards, blog-based cards, business cards, informative cards or analytical cards and etc.
Step 1: Create list of below required objects by using below script.
1. Table - Store the data
2. Sequence - Generate the primary key value
3. Trigger - Fire the action, when DML operations happening on the table
2. Sequence - Generate the primary key value
3. Trigger - Fire the action, when DML operations happening on the table
Table: (fxgn_customer_logos)
CREATE TABLE fxgn_customer_logos
(
logo_id NUMBER,
customer_name VARCHAR2(240 BYTE),
description VARCHAR2(4000 BYTE),
image_blob BLOB,
mime_type VARCHAR2(240 BYTE),
sort_order NUMBER,
updated_on TIMESTAMP (6),
updated_by VARCHAR2(240 BYTE)
);
Sequence: (fxgn_customer_logos_s)
CREATE SEQUENCE fxgn_customer_logos_s START WITH 1 INCREMENT BY 1;
Trigger: (fxgn_customer_logos_biu)
CREATE OR REPLACE TRIGGER fxgn_customer_logos_biu
BEFORE INSERT OR UPDATE ON fxgn_customer_logos
FOR EACH ROW
BEGIN
IF inserting THEN
IF (:NEW.logo_id IS NULL) THEN
SELECT fxgn_customer_logos_s.nextval
INTO :NEW.logo_id
FROM dual;
END IF;
END IF;
IF (inserting OR updating) THEN
:NEW.updated_on := LOCALTIMESTAMP;
:NEW.updated_by := nvl(wwv_flow.g_user,USER);
END IF;
END;
/
ALTER TRIGGER fxgn_customer_logos_biu ENABLE;
Step 2: Build a forms and report to populate the values into table (fxgn_customer_logos).
Navigation: Oracle APEX Home ==> App Builder ==> Select Application ==> Run Application ==> Create Page >

Screen 1: Create Page
I) Create Page: Below popup comes up, when the button Create Page > clicked. Choose an option "Form", which is listed under page type component.

Screen 2: Create Page
And It will navigate to Screen 3, where you should select an option "Report with Form"
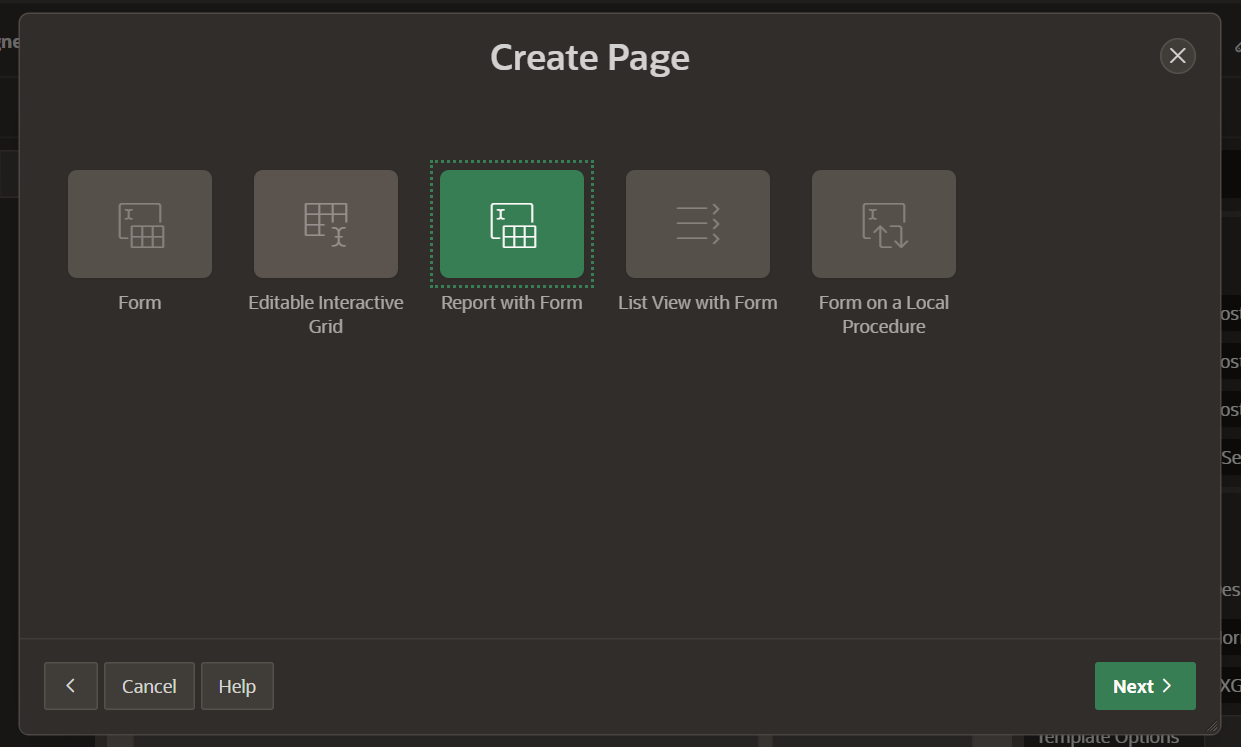
Screen 3: Create Page
And It will navigate to Screen 4 (Page Attributes)
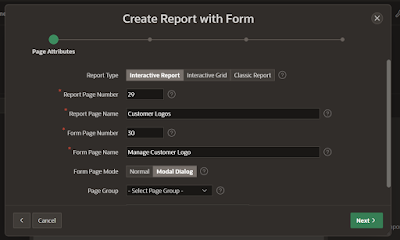
2) Page Attributes: Fill the required page attributes. (As per your requirement)
And click on Next >, it will navigate to below Screen 5 (Navigation Menu),

Screen 4: Page Attributes
Note: Page number can be changed based on the requirement. Mine report and form page was 29 & 30 respectively. You will need to update reference to "P29" & "P30" with your page number if it's different.
3) Navigation Menu: Set the navigation preference. (As per your requirement)

Screen 5: Navigation Preference
4) Data Source: Setup the data source (Select a table "fxgn_customer_logos") and select columns to be shown in the report.

Screen 6: Data Source

Screen 7: Columns to be shown in the report
And click on Next >, it will navigate to below Screen 6 (Create Form - Columns and Primary Key,

Screen 8: Columns to be shown in the form
(Ref. Fig 2 & 3)

Fig 2: Report Page

Fig 3: Form Page

Fig 4: Data Loaded
Step 4: Create a new blank page.
Note: Mine was page 27. You will need to update reference to "P27" with your page number if it's different.
Step 5: Create a "Classical Report" region to the page using below script.
SELECT apex_util.prepare_url( '#' ) card_link,
fcl.customer_name card_title,
CASE WHEN dbms_lob.getlength(image_blob) = 0 THEN
'<span class="no-image">'||apex_escape.html(fcl.customer_name)||'</span>'
ELSE '<img src="'||apex_util.get_blob_file_src('P30_IMAGE_BLOB',logo_id)
||'"></img>'
END card_text,
'' card_subtext,
NULL card_initials,
fcl.logo_id ID
FROM fxgn_customer_logos fcl
ORDER BY sort_order ASC;

Fig 5: Escape Special Characters
Step 7: Go to region appearance and change the template appearance to have a better look (if required).

Fig 6: Region Appearance
1) Template: Standard
2) Template Options:
I) Common:
2) Template Options:
I) Common:
ii) Body Height => Auto - Default
iii) Header => Hidden
iv) Accent => Default
v) Style => Remove UI Declaration
II) Advanced:
i) Body Overflow => Hide
ii) Item Padding => Slim PaddingStep 8: Go to report attributes and change the template options to bring card view.

Fig 7: Report Template Appearance
1) Template: Cards
2) Template Options:
i) Common:
i) General => User Template Defaults
ii) Style => Featured
iii) Icons => No Icons
iv) Layout => 5 Columns
v) Body Text => Auto
vi) Icon Shape => Circle
vii) Animation => Raise Card
Step 9: Change the style of the card by adding below piece of CSS to the page in inline CSS Section.
Navigation: Go to Page ==> CSS ==> Inline
.logo-cards .t-Card-icon,
.logo-cards .t-Card-titleWrap,
.logo-cards .t-Card-info {
display: none !important
}
.logo-cards .t-Card .t-Card-body {
padding: 0;
border: none;
margin: 0
}
.logo-cards .t-Card .t-Card-desc {
position: relative;
}
.logo-cards .t-Card img {
width: 100%;
vertical-align: middle;
max-height: 100%;
}
span.no-image {
display: block;
text-align: center;
color: #909090;
font-weight: 200;
white-space: nowrap;
padding: 0 12px;
}

Happy APEXing!!!...
References:
It was nice of you to include all the steps for this and the results look good (especially if you like logos for fast food :-) ). And as someone who still fumbles a lot getting my CSS right, I really appreciated the CSS you provided.
ReplyDeleteA couple questions, if I may?
* I'm curious about the benefit of specifying the the Static ID ("logo_region") in Step 6, since I don't see any other references to it.
* Also, in Step 7, the screenshot shows "escape special characters" is set to No, but the instructions say "Yes". I would think you want No, so the span displays?
Thanks!
This comment has been removed by the author.
DeleteThanks for pointing out the issues,
Delete* Yes, I didn't use the static Id anywhere (I forgot to remove it)
* Yes, Escape "Especial Characters" should be set to No.
I have changed it. Thank you Stew.
I'm happy to have helped. If you hadn't pointed out the static ID, I wouldn't have looked for where it was/wasn't used. Thanks for sharing these great ideas.
DeleteThank you, Stew.
Delete